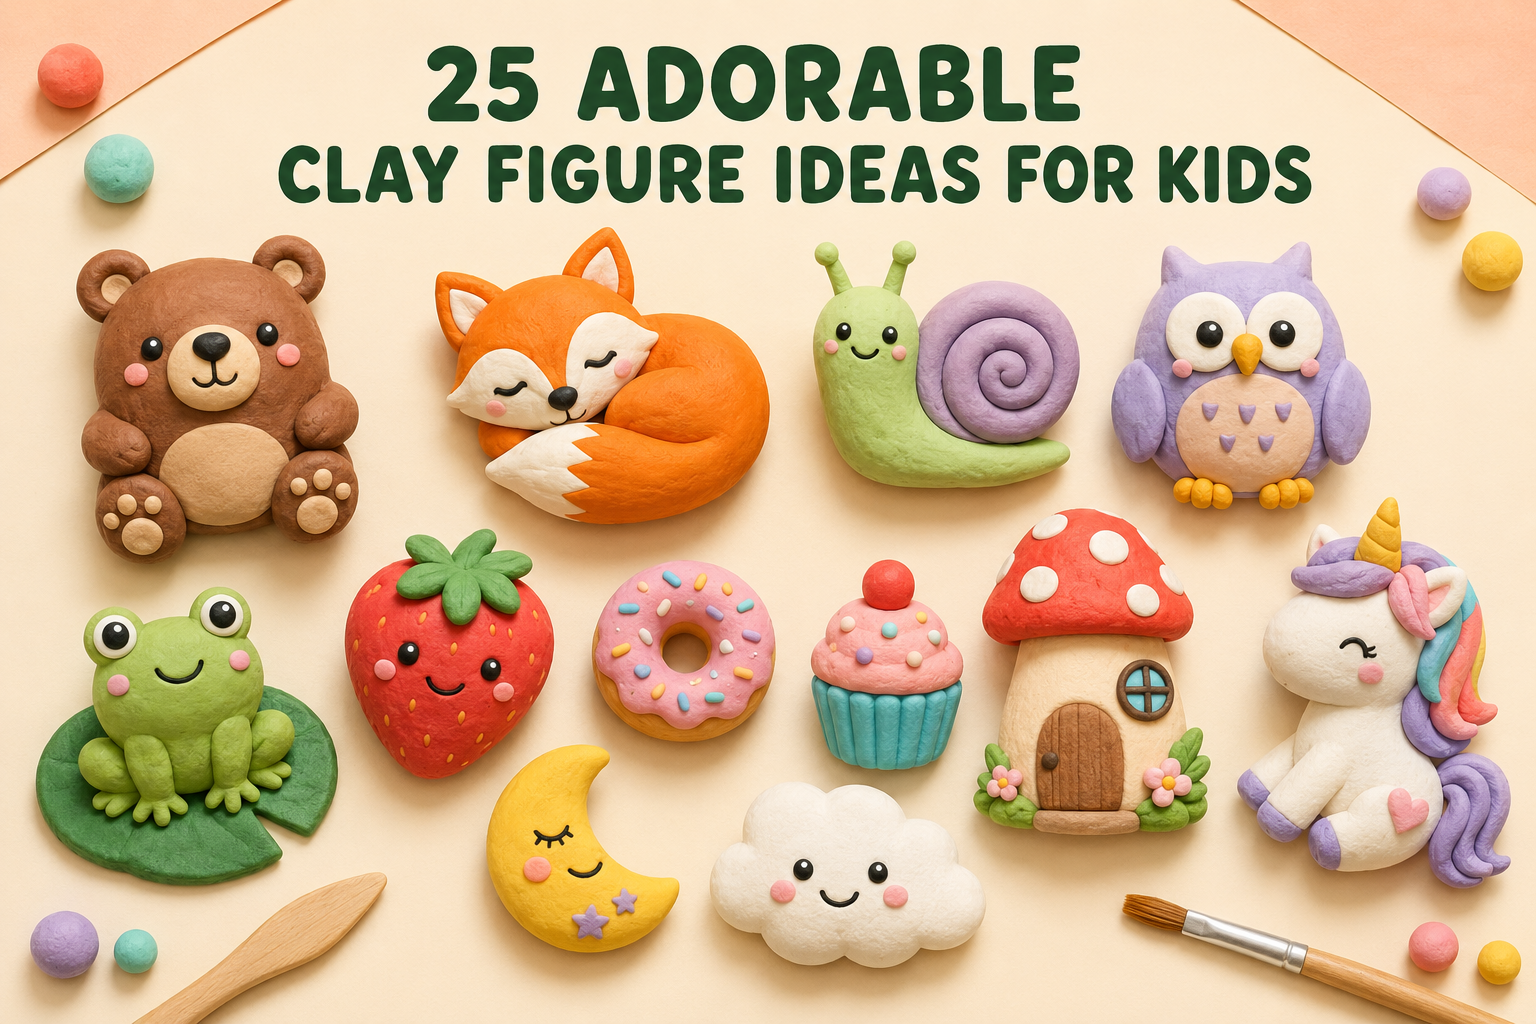
25 Adorable Clay Figure Ideas for Kids to Make
There is something magical about placing a lump of clay in a child’s hands. With no screen and no single “right” result, kids are free to squish, roll, pinch and shape until a tiny character comes to life on the table.
If you are looking for easy clay figure ideas for kids, this collection is filled with friendly animals, miniature foods, seasonal characters and make-believe creatures. Most of the projects begin with basic balls, coils and teardrop shapes, making them suitable for beginners and easy to adapt for different ages.
Choose a few favorites, cover the table and enjoy a relaxed, creative afternoon together.
Why Clay Is Such a Lovely Craft for Kids
Clay play is simple, open-ended and wonderfully hands-on. It gives children an opportunity to:
- Explore texture through squeezing, rolling, flattening and pinching
- Practise small hand movements used for tasks such as drawing and writing
- Turn their own ideas into three-dimensional characters
- Experiment without worrying about making a “perfect” finished project
- Enjoy a calming, screen-free activity at home
The slightly wobbly ears, uneven smiles and mismatched wings are often what make children’s clay creations most charming.
Which Type of Clay Is Best for Kids?
The best choice depends on whether your child wants to keep the finished figure or reshape it another day.
| Type of clay | Best for | What parents should know |
|---|---|---|
| Air-dry clay | Keepsakes, painted figures and ornaments | It hardens without an oven. Drying time varies by brand, thickness and room conditions. |
| Reusable modeling clay or dough | Younger children and everyday sensory play | It stays soft when stored correctly, so children can remake their figures. It is usually not intended as a permanent keepsake. |
| Polymer clay | Small, detailed figures for older children | It must be cured with heat. An adult should handle all baking and follow the manufacturer’s directions exactly. |
Always check the age guidance and safety instructions on the exact product you buy. Choose a child-appropriate, non-toxic product and supervise sharp tools, small pieces and all heat-related steps.
Clay Craft Supplies
You do not need a professional sculpting kit. Start with:
- Child-appropriate air-dry clay, modeling clay or polymer clay
- A wipe-clean mat, tray or sheet of wax paper
- A small rolling pin or smooth reusable cup
- Blunt clay tools or a child-safe plastic knife
- Toothpicks for texture, used with close adult supervision
- Washable tempera or acrylic craft paint suitable for the chosen clay
- Small paintbrushes
- An optional water-based, clay-compatible sealer for adult use
Keep craft tools separate from utensils used for preparing or serving food, particularly when working with polymer clay.
Six Easy Clay Shapes to Practise First
Nearly every cute clay character can be built from a few basic shapes:
- Ball: Roll clay between both palms for heads, bodies and fruit.
- Oval: Gently stretch a ball for animal bodies and faces.
- Coil: Roll clay back and forth with your fingertips for tails, arms and stems.
- Teardrop: Pinch one end of a ball for ears, wings and leaves.
- Flat circle: Press a ball gently for lily pads, cookies and faces.
- Cone: Narrow one end for hats, horns and robes.
Let children practice these shapes for a few minutes before choosing a project. It makes the figures easier to build and gives hesitant beginners a quick confidence boost.
25 Easy Clay Figure Ideas for Kids
Tiny People and Characters
1. Mini Family Figures

Make one little clay person for each family member. Use a large ball for the head, a smaller oval for the body and short coils for arms and legs. Children can add recognizable details such as glasses, curly hair or a favorite-color shirt.
2. Fairy Folk

Create a tiny person and press two flattened teardrops onto the back as wings. Add a flower-petal skirt, a leafy crown or a miniature wand. Pastel paint and tiny white dots can make the dried figure feel extra magical.
3. Sleepy Gnomes

Stack a round body, a small nose and a tall cone-shaped hat. The hat can sit low enough to hide most of the face, so children only need to add two curved sleepy eyes and a small beard.
4. Little Astronauts

Use a round body and a slightly larger flattened ball for the helmet. Add a small backpack, short boots and buttons on the spacesuit. A dark face opening dotted with tiny stars makes a fun finishing touch.
5. Tiny Chefs

Build a simple person, then add a puffy chef’s hat made from three or four small balls. Place a tiny clay spoon, bowl or rolling pin in the chef’s hands and create a miniature cake to display beside the figure.
Cute Clay Animals
6. Round-Bellied Bears

Start with one large oval body and a smaller round head. Press on two round ears, a button-like muzzle and stubby paws. Position the bear sitting down so it stays stable while drying.
7. Curled-Up Foxes

Shape the body into a curved teardrop and wrap a thick coil around it as a fluffy tail. Add pointed ears, a tiny nose and closed eyes. Paint the tail tip and chest cream after the figure has fully dried.
8. Baby Dragons

Make a plump oval body with a round head, tiny legs and a curled coil tail. Flatten small triangles for the wings and back spikes. Let children invent their own dragon colors instead of trying to make every dragon look the same.
9. Chubby Owls

Press a short oval slightly flat and add two large circle eyes. Pinch the top corners to suggest ear tufts, then scratch soft feather marks into the belly with a blunt clay tool. Sit the owl on a small clay branch for support.
10. Smiling Snails

Roll one long coil for the body and another coil into a spiral for the shell. Press the pieces together gently, then add two short eye stalks. Snails are one of the easiest clay animals for young beginners because their shapes can stay thick and simple.
11. Little Hedgehogs

Form a teardrop body with the pointed end becoming the face. Use a blunt tool to press rows of short lines across the back for spikes. Add a round nose, two dot eyes and tiny feet.
12. Wide-Eyed Frogs

Place a squat oval body on a flat green circle that looks like a lily pad. Add two large eye bumps and bent coil legs. A tiny pink tongue or a miniature fly can give the frog a playful story.
Miniature Clay Food
13. Kawaii Fruit Friends

Turn simple shapes into smiling strawberries, oranges, cherries and watermelon slices. Add two dot eyes and a curved mouth to each piece. Arrange the finished fruits in a tiny clay bowl or make a complete rainbow set.
14. Mini Donuts

Flatten a ball slightly and ask an adult to help make the center hole with a suitable blunt tool. Add a thin layer of contrasting clay for icing, followed by tiny sprinkle-shaped coils. These look especially cute as a pretend bakery display.
15. Tiny Cupcakes

Make a short cylinder for the cake case and press gentle vertical lines around it. Twist a soft coil into a frosting swirl and finish with one tiny cherry. Children can create a different flavour for every family member.
16. Colourful Sushi Rolls

Layer strips of different-colored clay, roll them together and let an adult slice the log with an appropriate clay tool. Add a dark outer layer for the seaweed and arrange the pieces on a miniature plate. Remind children that clay food is for pretend play only and must never be eaten.
Nature and Seasonal Figures
17. Mushroom Houses

Shape a thick cylinder for the stem and place a wide dome on top as the mushroom cap. Add a tiny round door, windows and stepping stones. A little snail or fairy sitting outside can turn it into a complete story scene.
18. Friendly Snowmen

Stack two or three balls, using the largest at the bottom. Add a cone nose, dot buttons, a scarf and a small hat. Place the snowman on a flat clay base so the pieces remain steady.
19. Pumpkin Friends

Make a ball and press shallow vertical grooves from top to bottom with a blunt tool. Add a short stem, leaf and friendly face. Create several sizes to make a cheerful little pumpkin family.
20. Blooming Flower Pots

Shape a small pot with a wide base, then insert sturdy clay stems topped with simple five-petal flowers. Keep the stems short and fairly thick so they are less likely to snap after drying.
Magical Clay Creations
21. Tiny Unicorns

Build the body from two ovals and use short, thick legs for stability. Twist two thin coils together to form the horn, then add a colorful mane and tail. A cloud-shaped base can help the unicorn stand securely.
22. Sleepy Moons and Stars

Cut or shape a thick crescent moon and a few rounded stars. Add closed eyes, rosy cheeks and tiny sleeping caps. These figures make sweet decorations, but they should remain decorative rather than being hung above a child’s bed unless safely secured by an adult.
23. Little Mermaids

Use a small oval for the upper body and a thick curved teardrop for the tail. Flatten two small pieces for the tail fins, then add flowing coils of hair. A seashell, pearl or tiny fish friend completes the underwater scene.
24. Pocket-Sized Wizards

Begin with a cone-shaped robe and place a small ball on top for the head. Add a pointed hat, a coil beard and a tiny wand. Children can press stars or moons into the robe before the clay dries.
25. Cloud Creatures

Join several soft balls and blend the edges to make a puffy cloud. Add a smiling face, dangling raindrops or a tiny rainbow. A flat-backed version is easier for young children and can be displayed on a shelf once dry.
Helpful Tips for Making Clay Figures With Children
Start Small—but Not Too Tiny
Small figures dry more evenly and are easier to finish in one sitting. However, avoid bead-sized pieces for young children because they can be difficult to handle and may become choking hazards.
Keep the Faces Simple
Two dot eyes and a small curved smile can give almost any figure personality. Children can use the rounded end of a paintbrush to press even eye shapes into soft clay.
Make Thin Parts Short and Sturdy
Long tails, skinny legs and delicate flower stems can snap. Make narrow parts slightly thicker than they look in the inspiration picture, and attach them firmly to the body.
Join Pieces Carefully
Follow the clay maker’s directions for attaching parts. With many air-dry clays, lightly scoring both surfaces before pressing them together can help, but different products behave differently.
Allow Plenty of Drying Time
Do not rely only on how dry the surface feels. Small air-dry projects may feel dry after about a day but can take two or three days to dry fully, depending on their thickness, the environment and the product. Follow the package instructions before painting or sealing.
Paint Only When Fully Dry
Painting damp air-dry clay can trap moisture or damage the surface. Let the figure dry completely, brush away dust and apply thin coats of child-appropriate craft paint.
Store Unused Clay Correctly
Seal unused air-dry clay in its original airtight container without adding a wet paper towel unless the manufacturer specifically recommends it. Keep polymer clay wrapped according to its product directions. Reusable modeling clay should be returned to its tub or sealed bag after play.
Let an Adult Handle the Oven
Polymer clay must be cured according to the manufacturer’s exact temperature and timing instructions. Children can shape age-appropriate products, but an adult should manage the oven, hot tray and cooling process.
Turn Clay Time Into a Regular Screen-Free Activity
Create a small “clay basket” containing a wipe-clean mat, a few child-safe tools and sealed containers of clay. When you need a calm rainy-day activity, let your child choose one figure from this list and gather the colors together.
You can also turn the projects into imaginative play. Make a tiny bakery for the clay chef, build a woodland home for the fox and hedgehog, or create an entire moon adventure for the little astronaut. Children often stay interested longer when each figure becomes part of a story.
For extra guidance, pair clay time with one of our printable activity packs or coloring pages. Children can color a character first, then try recreating it with clay.
Frequently Asked Questions
What is the easiest clay figure for a child to make?
A smiling snail is an excellent first project because it uses only two coils, a few tiny facial details and no complicated legs. Snowmen, fruit faces and cloud creatures are also easy beginner choices.
What can a five-year-old make with clay?
Many five-year-olds can make simple snails, bears, pumpkins, snowmen, fruit and flat cloud characters with supervision. Choose an age-appropriate product, keep the pieces large enough to handle safely and focus on basic shapes rather than tiny details.
Is air-dry clay or polymer clay better for kids?
Air-dry clay is often the simpler choice for a casual family craft because it does not require an oven. Polymer clay works well for older children who enjoy small details, but an adult must control the curing process and follow the product instructions.
How long do children’s clay figures take to dry?
Drying time depends on the brand, figure thickness, humidity and airflow. Some small air-dry pieces feel dry after approximately 24 hours but may require up to 72 hours to dry fully. Always use the instructions on the package as the final guide.
How can we stop air-dry clay from cracking?
Keep the thickness fairly even, avoid adding too much water, attach pieces securely and do not rush the drying process with strong heat. Very thick bodies and thin, unsupported parts are more likely to crack or break.
Do finished clay figures need to be sealed?
Not always. A compatible sealer may help protect a painted decorative figure, but it will not make every clay project waterproof or suitable for rough play. An adult should choose and apply a product recommended for the specific clay and paint.
Ready to Make Your First Clay Character?
You do not need perfect tools or advanced sculpting skills to enjoy these clay figure ideas for kids. Pick a forgiving first project—such as a snail, cloud or tiny fruit friend—and let your child change the colors, expression and details however they like.
The best part is not making a flawless figure. It is watching a small idea take shape in your child’s hands.
Looking for more easy screen-free fun? Explore our printable activity packs and coloring pages created to inspire quiet, imaginative play at home.
Leave a Reply